Bad sous vide setups usually fail before the first steak hits the bath. The cooker is fine, but the container is flimsy, the bags are wrong, the water level drops, and suddenly a technique built for control feels annoyingly fragile. A good sous vide starter setup guide fixes that by treating the method like a system, not a gadget.
That matters because sous vide is one of the few kitchen upgrades that can deliver restaurant-level consistency without demanding restaurant-level labor. It is also one of the easiest categories to overspend in. You do not need a lab bench. You need a compact, repeatable setup that handles proteins, vegetables, and weeknight batch cooking with minimal friction.
The core sous vide starter setup guide
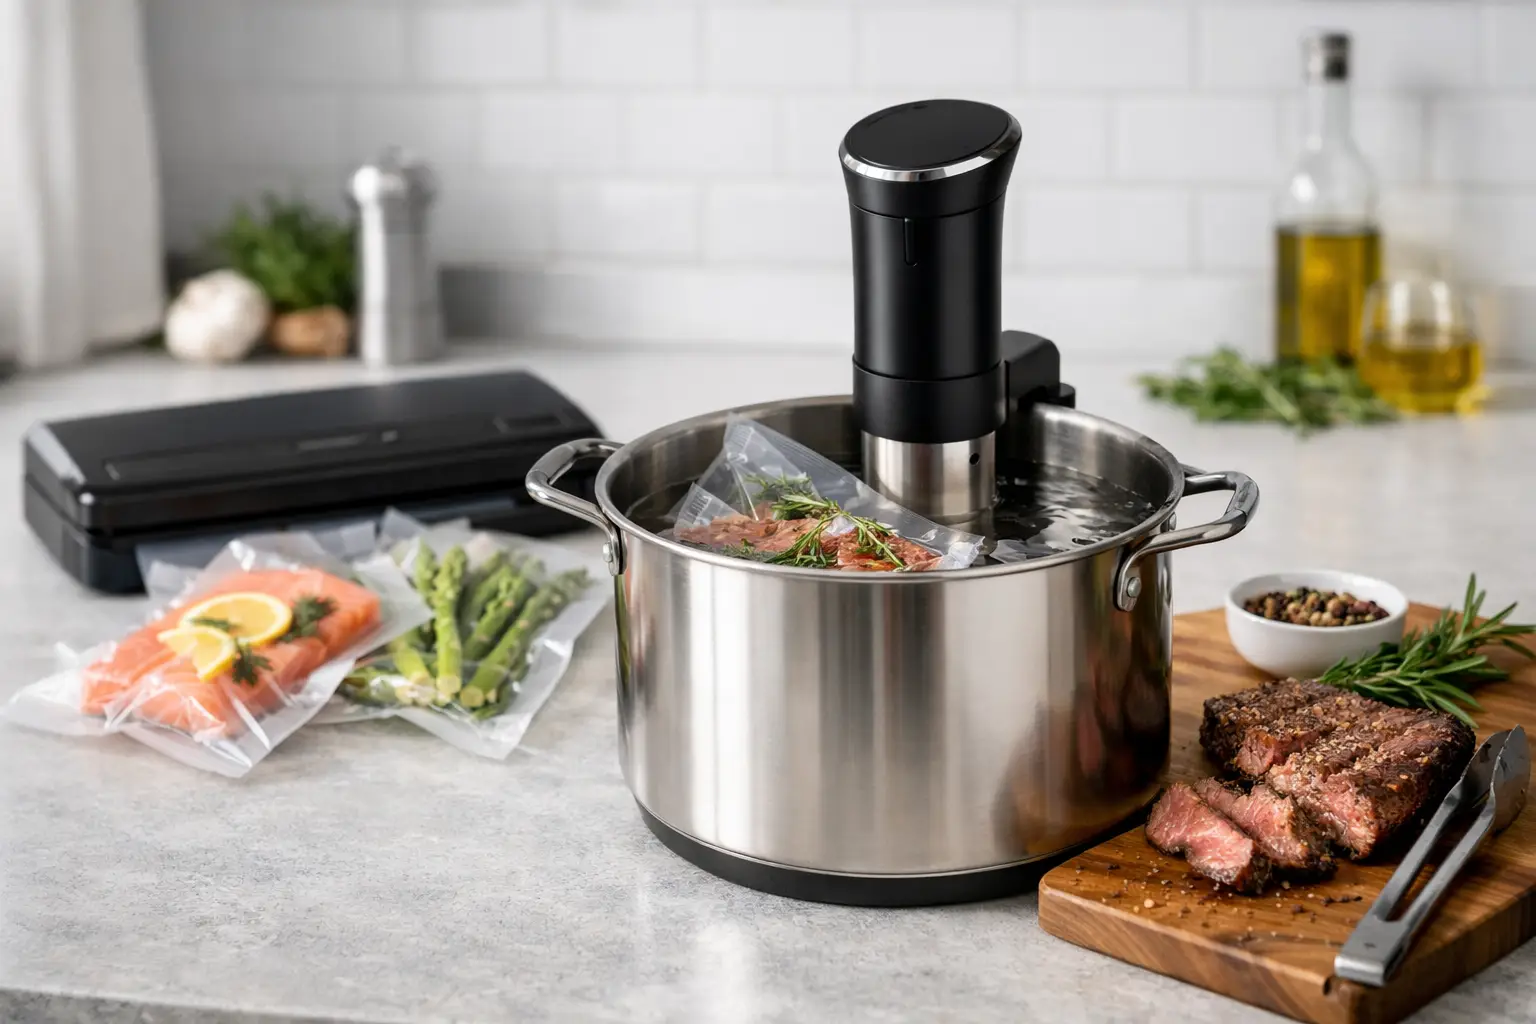
The starter system has four parts: the circulator, the water container, the bagging method, and the finishing station. Most beginners obsess over the first item and ignore the other three. That is backwards. The machine heats water, but the full setup determines stability, speed, and whether you will actually keep using it.
For most home cooks, an immersion circulator is the right entry point. It stores easily, clips onto a container, and gives you precision without dedicating a large appliance to one technique. A standalone water oven can be excellent, but it makes more sense for heavy use or very limited confidence with setup variables. If you are building a first system, go circulator first.
Power matters, but not in the way marketing often implies. A higher-watt circulator will generally heat water faster and recover temperature more efficiently after food goes in. That is useful, especially if you cook large cuts or multiple portions. Still, most quality units in the midrange are already powerful enough for normal home use. Reliability, clear controls, and secure clipping matter more than chasing the highest spec sheet number.
Pick a container like you mean to use it weekly
A stockpot works for a test run. It is not the best long-term answer. You want a container that is tall enough for circulation, wide enough for the portions you cook most often, and stable enough not to feel precarious on the counter.
Clear polycarbonate tubs are the sweet spot for many kitchens. They are inexpensive, easy to store, and let you monitor water level and bag position at a glance. A lid is not optional if you plan to cook for more than an hour or run higher temperatures for vegetables. Evaporation is the quiet setup killer in sous vide. A fitted lid, especially one cut for a circulator, keeps your temperature stable and your attention elsewhere.
If your kitchen is tight, choose one container and commit to it. The mistake is buying multiple sizes before you know your pattern. A 12-quart class container is enough for most households. It handles a couple steaks, several chicken breasts, pork chops, or a small roast without becoming bulky.
Bags: vacuum sealer or displacement method
This is the first real fork in the road. If you cook sous vide once or twice a month, heavy-duty zip-top freezer bags and the water displacement method are perfectly reasonable. They are simple, cheap, and often good enough for proteins cooked under moderate times and temperatures.
If you expect sous vide to become part of your weekly system, buy a vacuum sealer early. It improves contact around the food, reduces floating, handles marinades and batch prep better, and makes freezer organization much cleaner. It is not just a sous vide accessory. It is a workflow tool for portioning meat, reducing food waste, and staging meals.
There is a trade-off. Vacuum sealers take up space, and the cheapest ones can be fussy with moist foods. If your kitchen already has appliance creep, start with freezer bags and upgrade only after you have confirmed the habit. If you batch cook proteins, buy in bulk, or care about a cleaner freezer system, the sealer will earn its footprint.
Build the finishing station from day one
Sous vide cooks the interior with precision. It does not create the best exterior on its own. That final sear is not an extra flourish. It is part of the method.
Your finishing station should be close to your water bath and dead simple: a ripping-hot skillet or griddle, neutral high-heat oil, paper towels, tongs, and a resting surface. Drying the food matters more than people expect. Moisture is the enemy of fast browning, and a weak sear after a long cook is how people decide sous vide is overrated.
Cast iron is the obvious choice because it stores heat well and creates a dependable crust. Carbon steel works just as well if you already use it. A kitchen torch can help with edges or awkward shapes, but it should support the sear, not replace it in most cases. Torch-only results often look more dramatic than they taste.
The first setup mistake: overcomplicating the cook plan
A smart starter setup avoids recipes that make the method feel slow. Start with high-value wins: steak, pork tenderloin, chicken breast, salmon, and carrots. These show off the control advantage clearly. They also fit a normal dinner schedule.
Do not begin with a 48-hour short rib project unless that is genuinely why you bought the machine. Long cooks are part of sous vide’s appeal, but they are not the best proof of concept for a first-week setup. You want quick feedback and repeatable results.
A practical workflow that keeps sous vide useful
The best way to use sous vide at home is to think in stages. Season and bag ahead. Cook when convenient. Sear right before serving. Once you adopt that rhythm, the method stops feeling niche and starts acting like infrastructure.
For weeknights, pre-bagging is the force multiplier. You can season proteins on Sunday, seal them, refrigerate or freeze them, and then drop them into the bath with almost no prep friction. That changes the value equation. Instead of treating sous vide as a special-event technique, you turn it into a consistency tool.
Batching works especially well for chicken breasts, pork chops, and individually portioned steaks. It is less useful for delicate fish unless you know your timing well and plan to serve immediately. Again, it depends on your cooking style. If you host often, the setup shines because it lets you hold multiple portions at serving temperature with far less stress.
A note on safety and temperature drift
Sous vide rewards precision, which means sloppy setup details matter. Keep bags fully submerged. Use weights or clips if needed. Watch the minimum water line on the circulator. If you are running long cooks, the lid is doing real work, not cosmetic work.
Food safety also improves when your process is organized. Chill cooked items quickly if they are not being served right away. Label bags if you batch prep. Keep raw bagging surfaces clean, especially if you are sealing multiple proteins back to back. The system should reduce chaos, not hide it.
What to spend on, and what to ignore
Spend on the circulator, a proper container with lid, and either good freezer bags or a reliable vacuum sealer. Those purchases shape your actual results. You can keep the rest lean.
Ignore fancy racks until you know you need them. They help when cooking many portions at once, but they are not essential for a starter setup. Ignore app ecosystems unless remote control is truly useful in your routine. Some companion apps are polished, others feel abandoned. Physical controls on the device still matter.
You also do not need a dedicated sous vide branded finishing torch, premium designer tub, or an oversized commercial setup for a household of two or four. The premium end of this category can be excellent, but many buyers mistake specialization for necessity.
The setup that fits different kitchens
If you are apartment-based with limited storage, the efficient setup is a compact circulator, one medium polycarbonate container, freezer bags, and a cast iron skillet you already own. That gets you into the method with very little footprint.
If you cook in bulk and treat your kitchen like an operating system, add a vacuum sealer early and organize proteins by portion and date. This is the strongest version of the sous vide starter setup guide for busy households because it cuts prep time, improves inventory control, and makes expensive proteins easier to cook well.
If your main use case is entertaining, prioritize container capacity and lid fit. Holding several steaks or chops at temperature while you finish them in waves is where sous vide starts to feel less like a trick and more like a service advantage.
The bigger point is simple. Sous vide is not impressive because it is precise. It is impressive when that precision fits your real kitchen behavior. Buy for the workflow you will repeat, not the fantasy setup you admire online. Get the bath stable, the bagging easy, and the sear fast. Once those three pieces click, the technique starts paying rent on your counter.