A good batch cooking container workflow is not a collection of matching glass boxes. It is a storage and assembly system that lets Tuesday dinner move from refrigerator to plate without turning into a hunt for lids, a soggy grain bowl, or an expensive delivery order.
Advanced home cooks often overinvest in recipes and underinvest in the handoff between cooking and eating. The result is familiar: a productive Sunday session produces six containers of the same meal, most of which become less appealing each day. Professional kitchens solve this differently. They batch components, hold them in formats that protect quality, and build each plate close to service. Your home setup should do the same.
Build the batch cooking container workflow around components
The first decision is whether you are storing finished meals or modular parts. Finished meals are efficient when you need grab-and-go lunches and do not mind eating a repeated dish. Modular components take slightly more planning but create better dinners across four or five days.
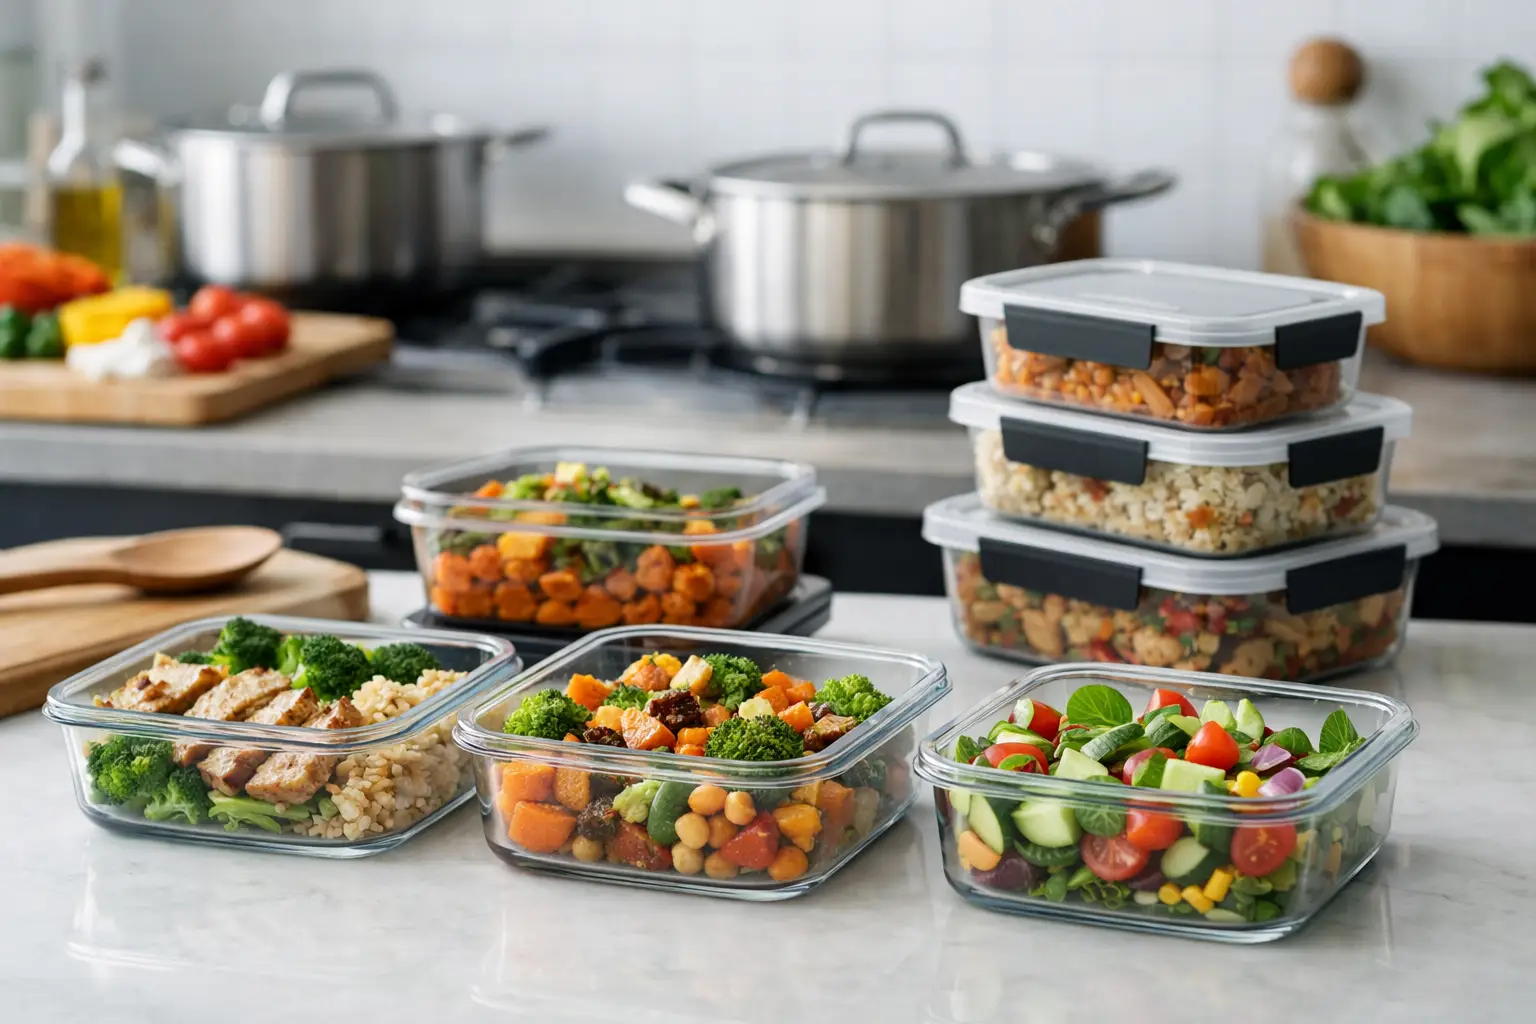
For most households, the stronger system is a hybrid. Portion two or three complete lunches immediately, then store the rest as components: a cooked protein, a grain or starch, roasted vegetables, washed greens, a sauce, and a crunchy or fresh finish. This preserves choice without creating a refrigerator full of unlabeled fragments.
Think in terms of the final moment of assembly. A rice bowl may need hot rice, reheated chicken, cold cucumber, spicy sauce, and toasted seeds. Those elements should not occupy the same container just because they will eventually share a bowl. Separate storage gives you control over temperature and texture, which is the difference between reheated food and food that still feels deliberately cooked.
Assign a job to every container size
Container systems fail when every vessel is expected to do every job. A deep 32-ounce container is useful for soup but inefficient for a shallow layer of roasted broccoli. Small deli-style containers are excellent for sauces but frustrating for a family-size braise.
A practical setup uses three or four formats, not twelve. Start with a shallow rectangular container for proteins and roasted vegetables, a medium rectangular or square container for grains and cooked beans, small leak-resistant containers for sauces and toppings, and a few larger vessels for soups, stews, or bulk-prepped salad greens.
Shallow containers matter more than they seem. Food cools faster in a lower layer, reheats more evenly, and is easier to see at a glance. They also make portioning less abstract. You can look at a container of chicken thighs and see whether it represents two dinners or four lunches.
Glass is the best all-around option for reheating, stain resistance, and long-term durability. Its trade-off is weight, cabinet space, and the real risk of a shattered container at the wrong moment. High-quality BPA-free plastic is lighter and more practical for work lunches, freezer portions, and families managing a large weekly volume. The smart move is not choosing one material on principle. Use glass for home storage and reheating, then use lightweight plastic where portability actually matters.
Create zones, not a container pile
The refrigerator should operate like a small service line. If containers are stacked wherever they fit, the workflow depends on memory. Memory is unreliable at 7:15 p.m. when someone is hungry and the kitchen is already in use.
Reserve one shelf or one clear bin as the active meal-prep zone. Put ready-to-eat lunches at the front. Put dinner components behind or beside them. Keep sauces together in a narrow bin so they do not migrate behind milk cartons. The point is not aesthetic organization. The point is reducing the number of decisions between opening the fridge and starting dinner.
Labeling is worth the minor annoyance, especially for anything that will survive more than two days. Write the item and date directly on freezer-safe tape or use reusable labels. “Chicken, Mon” is better than “meal prep,” because it tells you what it is and establishes an eating order. When multiple people use the kitchen, labels also prevent the common failure mode where a carefully planned dinner component is quietly eaten as a midnight snack.
Use a first-in, first-out rule. New food goes behind older food, and the oldest prepared components are planned first. This is a basic restaurant habit because it works. It controls waste without requiring a complex inventory app.
Separate wet, crisp, and delicate ingredients
The most expensive mistake in batch cooking is not wasted food. It is making food you no longer want to eat. Texture is usually the reason.
Keep sauces, dressings, pickled items, and juicy vegetables separate until serving. Store herbs dry with a paper towel, not sealed beside hot food where condensation accelerates decline. Hold toasted nuts, fried shallots, seeds, and croutons at room temperature in an airtight jar if they will be used within the week. Refrigerating them can soften the very texture they are meant to provide.
Greens deserve their own protocol. Wash them, dry them aggressively, and store them with a dry paper towel in a roomy container. Do not compress them beneath dense items. If greens are part of your lunch plan, pack the dressing separately and place heavier ingredients in another container. The meal may take 30 seconds longer to assemble, but it will remain edible on day four.
This logic applies to hot food too. Crispy roasted potatoes do not retain their peak texture in a sealed container, but they can still be worth prepping if you reheat them in a hot skillet, toaster oven, or air fryer rather than a microwave. The workflow should match your available equipment. If the microwave is your only weekday tool, prioritize dishes that reheat well with moisture, such as braises, curries, grains, beans, and saucy proteins.
Use cooling and portioning as quality control
Do not seal a large volume of steaming food into deep containers and call the job done. It traps heat, creates condensation, and slows cooling. Divide hot food into shallow containers, leave the lids ajar briefly while steam escapes, then refrigerate promptly. Perishable food should not sit out for more than two hours, or one hour in very hot conditions.
This is where a sheet pan earns its place as a workflow tool. Spread roasted vegetables or cooked grains briefly before packing, and you reduce carryover steaming. For soups and stews, portion into smaller containers rather than refrigerating one giant pot. You gain faster cooling, easier reheating, and portions that match real meals.
Portion based on use case, not vague restraint. A lunch container should contain a complete, satisfying meal. A dinner protein container should hold the amount your household typically uses at one meal. Sauce containers should carry enough for the dish, plus a little margin, rather than forcing everyone to ration flavor.
Design the week in two service windows
One Sunday batch is often asked to survive too long. By Friday, the food may still be safe if handled properly, but its quality and your interest have usually dropped. A better model is a primary prep window and a short reset.
Use the first session for durable foundations: cooked grains, beans, braised meats, roasted vegetables, washed greens, and two sauces. Midweek, spend 20 to 30 minutes replenishing one fresh element and one protein or starch. That could mean cooking salmon, making a quick tray of vegetables, or steaming fresh rice while the original components are used up.
Freeze strategically from day one. If you make more than you can reasonably eat within a few days, portion part of it before it enters the refrigerator rotation. Soups, sauces, cooked beans, shredded meats, meatballs, and grain portions freeze well. Delicate salads, crisp vegetables, and dairy-based sauces generally do not reward this treatment.
The freezer is not a graveyard for good intentions. It is a pressure-release valve for production. Label frozen containers with the item and month, then keep a small visible section for ready-made meals. When a work deadline or family schedule disrupts the plan, that reserve protects the system.
Choose lids for the behavior you actually have
A container is only useful if its lid returns to its matching base. This sounds trivial until you own 18 containers from six brands. Standardize on one primary line whenever possible, and buy replacement lids before you buy more random containers.
Snap-lock lids tend to be more leak-resistant for lunches and sauces. Simple press-on lids are faster for high-volume home storage and can be easier to stack. Neither is universally better. A solo professional carrying lunch on public transit has different requirements from a family serving dinners at home.
Before expanding your collection, run a friction test for one week. Notice what slows you down: missing lids, containers too deep to find food, not enough small sauce vessels, poor stackability, or no place to cool food. Buy to eliminate that specific bottleneck. That is how a container setup becomes a kitchen system instead of another category of clutter.
The goal is not to make every meal feel preplanned. It is to make a good meal the easiest available option when the week gets loud.
If you found these tips helpful, explore more of our food & cooking guides.