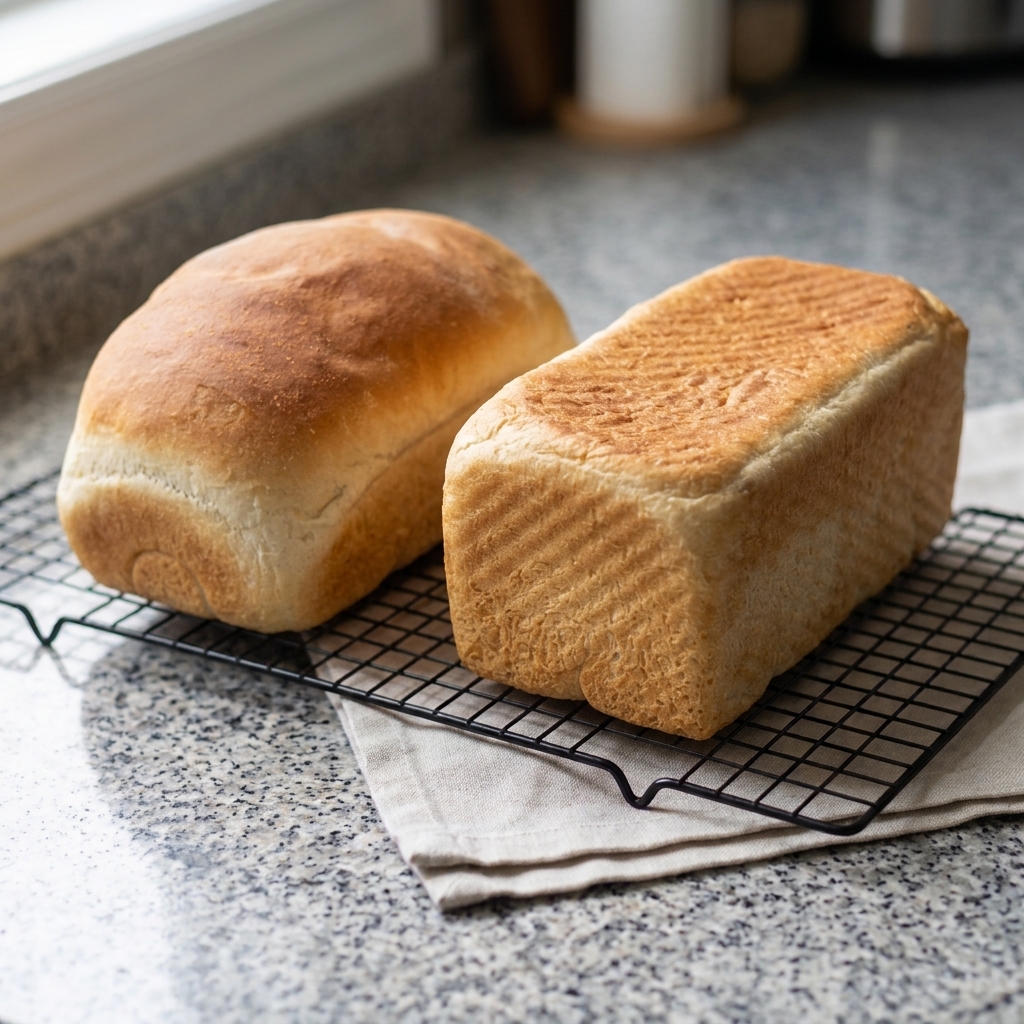
Ingredients
Method
Step 1: Knead in the Bread Maker
- Pour the water (250 g), oil (25 g), and honey (25 g) into the pan of your bread maker.
- Add the salt (6 g).
- Spread the flour (375 g) evenly over the liquids so it covers them completely.
- Make a small well in the center of the flour and add the yeast (3 g). This keeps the yeast dry and away from the salt until mixing begins.
- Select the DOUGH cycle and press start. The machine will knead the dough and give it its first rise.
Peek in after about 5 minutes of kneading. The dough should form a smooth ball that feels slightly tacky. If it looks dry and ragged, add water 1 teaspoon at a time. If it's sticking to the sides like batter, add flour 1 teaspoon at a time.
Step 2: Degas and Shape
- When the cycle finishes, turn the dough out onto a lightly oiled work surface.
- Press down gently with your hands to release the large air bubbles.
- Pat the dough into a rectangle, then roll it up tightly into a cylinder about the length of your pan, like rolling a burrito. Pinch the seam closed. A tight roll helps prevent gaps and air pockets in the crumb.
Step 3: Choose Your Pan and Bake
Option A: Pullman Pan (for square sandwich slices)
- Grease the pan and the inside of its lid well with butter or oil.
- Place the dough in the pan, seam side down.
- Slide the lid on, leaving about 1 cm open so you can watch the rise.
- Let it rise at room temperature until the dough reaches about 80% of the pan's height, roughly 2 cm below the rim. This usually takes 30 to 60 minutes, depending on how warm your kitchen is.
- About 20 minutes before you expect the dough to be ready, preheat your oven to 180°C (350°F). Countertop ovens often heat faster, so check yours.
- Close the lid completely and bake for 32 minutes. Keep the lid on for the entire bake.
My Pullman pan measures 10 × 19 cm and 11 cm deep (about 4 × 7.5 × 4.3 inches). This recipe makes exactly the right amount of dough for that size, so if your pan is larger, expect a shorter loaf.I bake mine for exactly 32 minutes at 180°C (350°F) in my Gourmia countertop oven. Every oven runs a little differently, so the first time you bake this, use the doneness cues below to confirm.
Option B: Standard Loaf Pan (for a classic domed top)
- Grease the pan.
- Place the dough in the pan, seam side down.
- Cover loosely with a clean kitchen towel or greased plastic wrap.
- Let it rise until the top of the dough domes 2 to 3 cm (about 1 inch) above the rim. This usually takes 30 to 60 minutes.
- About 20 minutes before you expect the dough to be ready, preheat your oven to 180°C (350°F).
- Bake uncovered for 28 to 32 minutes, until deep golden. If the top browns too quickly after about 20 minutes, cover it loosely with aluminum foil.
Use an 8½ × 4½ inch (about 21 × 11 cm) loaf pan. A larger 9 × 5 inch pan will work, but the loaf will be flatter and won't dome as much.
Step 4: Cool Completely
- Turn the loaf out of the pan onto a wire rack as soon as it comes out of the oven. Leaving it in the pan traps steam, which makes the sides and bottom soggy.
Let it cool for at least 1 to 2 hours before slicing. The inside keeps setting as it cools, and cutting too early gives you a gummy, squished crumb.