The difference between a frustrating dinner service and a controlled one is rarely knife skill. It is usually setup. Learning how to build chef prep stations means designing the few square feet around you so every tool, ingredient, and finished component has a predictable place. Professional cooks call this mise en place, but the useful part is not the French phrase. It is the operating system behind it.
A chef prep station is not a countertop covered in bowls. It is a temporary production line built around one task: break down vegetables, portion proteins, bake, sauté, assemble, or plate. When the station matches the task, you stop crossing the kitchen for salt, hunting for a clean spoon, or leaving raw chicken beside the salad you are about to serve.
Start With the Menu, Not the Counter
Most home cooks set up based on the kitchen they have. Chefs set up based on the work that must happen next. That distinction matters.
Before pulling out equipment, read the recipe or menu from start to finish and mark three things: what needs to be cut or measured, what needs heat, and what must be finished close to serving time. A stir-fry, for example, requires a fast cooking station beside the stove and a separate cutting station for prep. A braise needs less burner-side real estate but benefits from a clear zone for searing, holding aromatics, and managing the Dutch oven.
The goal is to establish a logical sequence: receive ingredients, wash or trim, cut, cook, then hold or plate. Your food should move forward through that sequence. It should not bounce between sink, refrigerator, cutting board, and stove because the counter happened to be empty there.
For a weeknight meal, one primary prep station may be enough. For a dinner party or batch-cooking session, build separate stations for cold prep, hot cooking, and finishing. The extra structure feels excessive until you are cooking four dishes at once and can still see the counter.
Build the Core Chef Prep Station
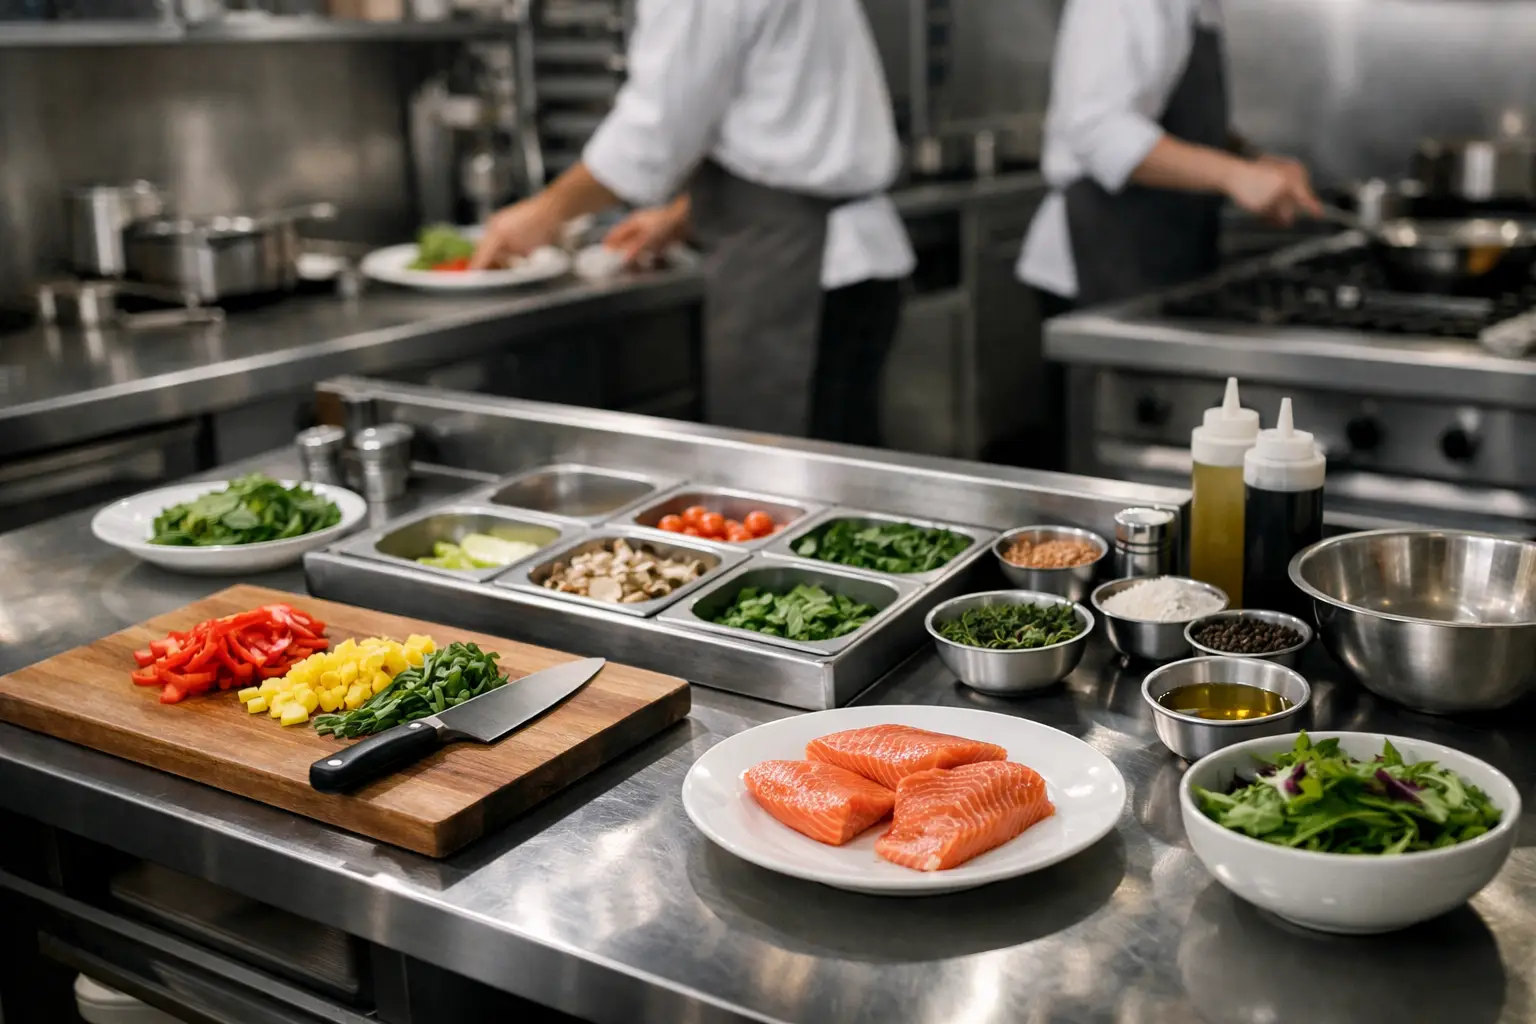
A productive station has five functional zones, even if they share a small counter. Think in zones rather than buying more gear.
1. The Cutting Zone
Place a large, stable cutting board in the center of your usable surface. Put a damp kitchen towel or non-slip mat underneath it. A board that shifts turns efficient knife work into a safety problem.
Your chef’s knife, paring knife, bench scraper, and a small bowl for scraps belong within arm’s reach. If you are working through a large amount of produce, use a sheet pan or hotel pan next to the board: prepped ingredients go on one side, uncut ingredients on the other. This is faster than filling the counter with individual bowls, and it makes your progress visible.
Do not use your best knife as a tool for opening packages, prying frozen food apart, or scraping scraps into the trash. The bench scraper handles transfer work cleanly, protects the blade edge, and keeps the board available for the next ingredient.
2. The Ingredient Zone
Arrange ingredients in the order they enter the recipe, not by grocery category. For a sauce, that may mean oil, aromatics, tomato paste, wine, stock, then herbs. For baking, it may mean dry ingredients, sugar, eggs, dairy, and leavening.
Measure high-risk or high-impact ingredients before heat goes on. Salt, acids, chile, cornstarch slurry, and finishing butter can change a dish in seconds. Having them portioned prevents the common failure mode of realizing the pan is too hot while you are still looking for the vinegar.
Small prep bowls are useful, but they are not mandatory. Use them for ingredients that must be added quickly or in exact amounts. Use a labeled sheet pan, deli containers, or shallow storage containers for larger components. The right choice depends on volume and timing, not how photogenic the setup looks.
3. The Cooking Zone
The cooking zone begins at the edge of the stovetop, not in the center of the kitchen. Keep only active tools here: the pan, its lid if needed, a heat-safe spoon or spatula, tongs, and a small resting surface for hot handles or messy utensils.
Set oil, salt, and the ingredients going into the pan first within one step of the burner. Everything else should stay out. Crowding the stove with unopened jars, cutting boards, and backup tools creates heat exposure, spills, and decision fatigue when timing gets tight.
Use one vessel for waste near the prep station and one dedicated resting area for cooked food. A quarter sheet pan with a wire rack is particularly useful for seared proteins, fried items, roasted vegetables, and anything that should not sit in its own steam. This single piece of equipment often improves results more than another specialty pan.
4. The Cleaning Zone
A station without a cleaning plan collapses halfway through service. Put a folded side towel where you can grab it without reaching over the burner. Keep a bowl or container for compost and scraps beside the board. Set a second container nearby for used tasting spoons, small tools, or packaging that should not return to the clean counter.
The sink is not storage. A sink full of knives and pans blocks your ability to wash produce, cool a hot pan safely, or reset between courses. Wash and reuse tools during longer cooking sessions when practical, but do not interrupt a hot cooking phase to chase perfection. The better move is to contain the mess, then reset at a natural pause.
5. The Finishing Zone
Reserve a clean, dry landing area for plated food, garnishes, final seasoning, and tasting. This zone should be away from raw proteins and preferably away from the splatter radius of the stove.
Finishing ingredients deserve their own logic. Flaky salt, pepper, citrus, herbs, grated cheese, infused oil, and a clean spoon should be available only if they are actually part of the final move. Keeping every condiment out “just in case” makes the station noisy and encourages random adjustments instead of deliberate seasoning.
How to Build Chef Prep Stations in a Small Kitchen
Small kitchens do not need smaller standards. They need more aggressive resets and equipment that can serve multiple roles.
Start by claiming one surface as the active station, even if it is only a 24-inch stretch of counter. Clear it completely. Move appliances that are not part of the meal, including the toaster, coffee gear, and decorative canisters. A portable cart, sturdy table, or rolling island can become an overflow prep surface, but it should support the workflow rather than become a dumping ground.
Vertical storage matters more in compact rooms. Use a sheet pan leaned upright as a staging tray, stack nesting bowls, and keep frequently used utensils in a countertop crock only if it sits outside your cutting path. A magnetic knife strip can free a drawer, but mount it away from high-traffic edges and out of reach of children.
There is also a point where pre-prep is smarter than forcing every task into the final hour. Wash and dry greens, make dressings, portion proteins, and chop sturdy vegetables earlier in the day. Leave apples, avocados, delicate herbs, and anything that oxidizes or wilts for closer to service. The system should protect quality, not chase efficiency at its expense.
Control Food Safety Through Station Design
Food safety is not a separate checklist after setup. It is built into the map of the station.
Keep raw proteins on a tray or in a rimmed container, ideally on the lowest practical work surface before they go to the pan. Use a separate board for raw protein, or fully wash and sanitize the board before it becomes a surface for ready-to-eat food. Color-coded boards can help in a busy household, but a disciplined cleaning routine matters more than color.
Cold ingredients should not sit out because the recipe is long. Return dairy, seafood, ground meat, and prepared foods to the refrigerator until their actual cooking or assembly window. If you are staging for a larger gathering, use shallow containers and work in smaller batches rather than leaving everything on the counter for an hour.
Taste with a clean spoon every time. This sounds elementary, yet it is one of the easiest standards to abandon when cooking gets fast. Keep a small cup of tasting spoons near the finishing zone, then send used spoons directly to the cleaning container.
Run a Reset Between Courses
The most useful professional habit to copy is not speed. It is resetting the station before the next phase begins.
After prep, discard scraps, wipe the board, consolidate ingredients, and move only the next set of tools into position. After cooking, transfer food to its holding or finishing area, turn off unused burners, and clear the stove-side clutter. These resets take two or three minutes. They prevent the 20-minute cleanup spiral and lower the chance of making a rushed mistake.
Use this quick test before starting a new task:
- Is the work surface clear enough for the next ingredient?
- Are clean tools separated from used tools?
- Is raw food contained and away from ready-to-eat food?
- Can you reach the next five items without leaving the station?
If the answer is no, reset before proceeding. A prep station should reduce decisions, not create an impressive-looking pile of equipment.
Build for Repetition, Then Refine
The best setup is personal. A left-handed cook may reverse the knife and scrap positions. Someone cooking for a family of five may rely on larger sheet pans and storage containers than a solo cook. An induction range may need more intentional landing space for hot pans than a gas range with continuous grates.
Run the same station design for several meals before changing it. Notice where you turn, reach, spill, or pause. Those friction points are data. Move one category of tools, add one tray, change the order of your ingredients, then test again.
A chef prep station is not a styled countertop. It is a repeatable command center that gives your attention back to the food, the timing, and the people waiting to eat.